
In THE PREVIOUS Blogpost we explored THE VISUAL CONNECTION OF TABLES IN IDEA. This Post demonstrates THE SIMPLY THE EXTENSIVE FUNCTION OF THE "NORMAL" CONNECTION OF TWO DATASETS IN IDEA WORKS.
Before we dig into this, let me start with the advantages of this method of table joins versus the visual table linking: Because one or the other may ask: If joining several tables with the visual method is so easy and clear, what for is there a further method in IDEA?
The simple answer is greater functionality of the method explained here: With this function you can determine the amount of data considering the mathematical theory of sets.

Since you are connecting the two tables with the help of an index key. An index is a data field / a column that is contained in both data sets. For that purpose it's even okay if their column names are not identical -as in this case.
The only requirement for an index is that the data is the same and means the same. That means the same number means the identical customer for example in both data sets.
As I wrote in my previous blog post about, with visual table joining only the matching records of both source tables will appear in the results file. But, if you want to have all the records of the first file, for example, no matter if there is a matching record / index in the second file, you use the method described in this here article. In the example case shown, this would mean that I want to assign customer master data to all open invoices, whether customer master exists in the table or not.
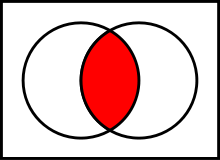
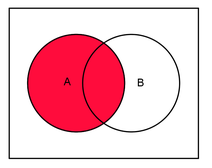
Good old set theory
With help of the set theory I´m going to show you now the options using this table join function (In IDEA simply hoover with the mouse over the join options, this describes the options, too):


Now: How do I connect two data sets with each other?
1. The files to be connected must both be open.
2. Check already at this point (if not you need redo the whole thing again):
1. Which column do you use as index, so which column appears as unique identifier in both tables?
2. Make sure that this column has the same field type in both tables, i.e. "numeric" or "character" in both. I describe what to do once the two columns don't match in the animated image.
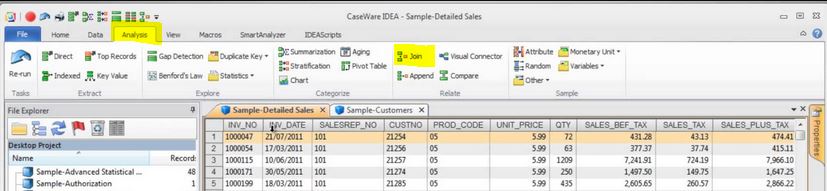
3. Finally you click "Join" and you can do this in two ways:
1. Click with the right mouse button on the first file and then on "Join with opened file" or
2. Under the tab "Analysis" click on “Join”.
4. In the new window that opens, select the first file to be linked. This file - just like the second one- needs to be opened before.
5. If in step 3. you clicked right mouse button, the first file is already selected and you can immediately select "fields", that is columns, which are to appear in the result file.
6. Now you select the second file below that and in the same way the fields, which are to be taken over from this second data set into the result file.
7. Below, you select the unique identifier that has already been mentioned above. This is the most important step when joining tables.
8. Below this, you give the new file a name.
9. Finally, you choose which rows will appear in the result file. So all lines from the first file or only matching lines or all lines from the second file or… should appear in the result file. We talked about exactly this step above. Remember set theory graphs?
10.Then click on "Ok" and off it goes: A new file with the unified two data sets is created. Tada
The animated GIF image shows the previous steps again (sorry for the German interface, but buttons are located the same throughout the language versions of IDEA):


This shows how simple a table join works in IDEA.
Have fun joining!
Kommentar schreiben